Using a local node
You can use either a remote or local node to sync your Haven vault. This article will describe the process to use a local node.
It is beneficial to users and the network to use a local node if you are able. It will take up a lot of hard drive space (35Gb+) but provides several advantages:
- Not reliant on other nodes to process transactions
- Better security- (less susceptible to malicious node activity who may try to trace you IP address etc)
- More nodes being run on the network gives everyone better security and resiliency
To use a local node you need to follow these steps:
Go to products and select the CLI vault for your operating system.
Download and save the folder. Open the folder and select havend
Click to open and run this using your terminal.
You will then begin to sync with the Haven network. This will take some time to complete. Once finished it will display SYNCHRONIZED OK
Once you have set up and opened a desktop vault account you will then have to sync to the network. This can be done as follows:
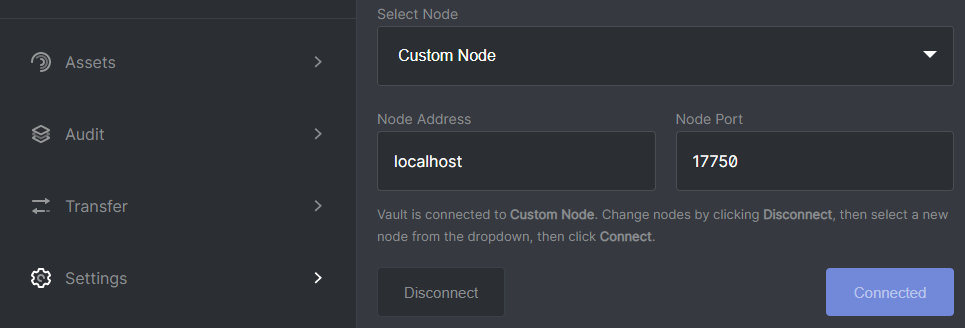
Got to SETTINGS
From the drop down node menu select Custom Node
Then enter the following into the Node Address and Node Port boxes:
Node Address: localhost
Port: 17750
Then click CONNECT. Your vault will then find your local node (daemon) and sync with the network.
NOTE: It is important that you are not running any CLI or other vaults using your local node as it may interfere and prevent the connection.